1. Force a synchronization using PowerShell.
Below is an example of the command you can use:
Start-ADSyncSyncCycle -PolicyType Delta
The above command will start a delta synchronization cycle, which synchronizes changes made since the last synchronization cycle.
If you want to synchronize all changes, you can use the following command:
Start-ADSyncSyncCycle -PolicyType Initial
2. Force synchronization between your local Active Directory and Azure AD using Azure AD Connect.
Here are the steps:
- Open the Azure AD Connect sync configuration wizard on your synchronization server.
- On the Welcome page, click on “Configure” and then on the “Customize synchronization options” button.


- On the Connect to AD DS page, enter the credentials of an account that has permission to synchronize your local Active Directory to Azure AD, and then click Next.
- On the Optional Features page, select the “Synchronize now” checkbox, and then click Next.
- On the Ready to Configure page, click the “Configure” button to start the synchronization process.

3. Force synchronization from the Synchronization Service Manager
- Open the Synchronization Service Manager on your synchronization server. You can usually find it in the Start menu under the Azure AD Connect folder.
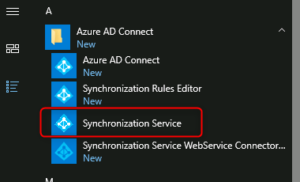
- In the left-hand pane, click on the “Connectors” tab.
- Select the connector that represents your local Active Directory, typically named “Active Directory Connector.”
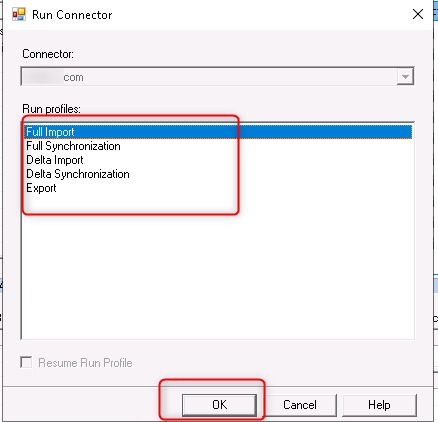
- Right-click on the connector and choose “Run.”

- A dialog box will appear with various synchronization options. Select the appropriate synchronization type based on your requirements. For example, you can choose “Delta Import and Delta Synchronization” to synchronize only the changes since the last synchronization. If you want to synchronize all changes, choose “Full Import Full Synchronization.”
- Click “OK” to start the synchronization process.
Leave A Comment?